
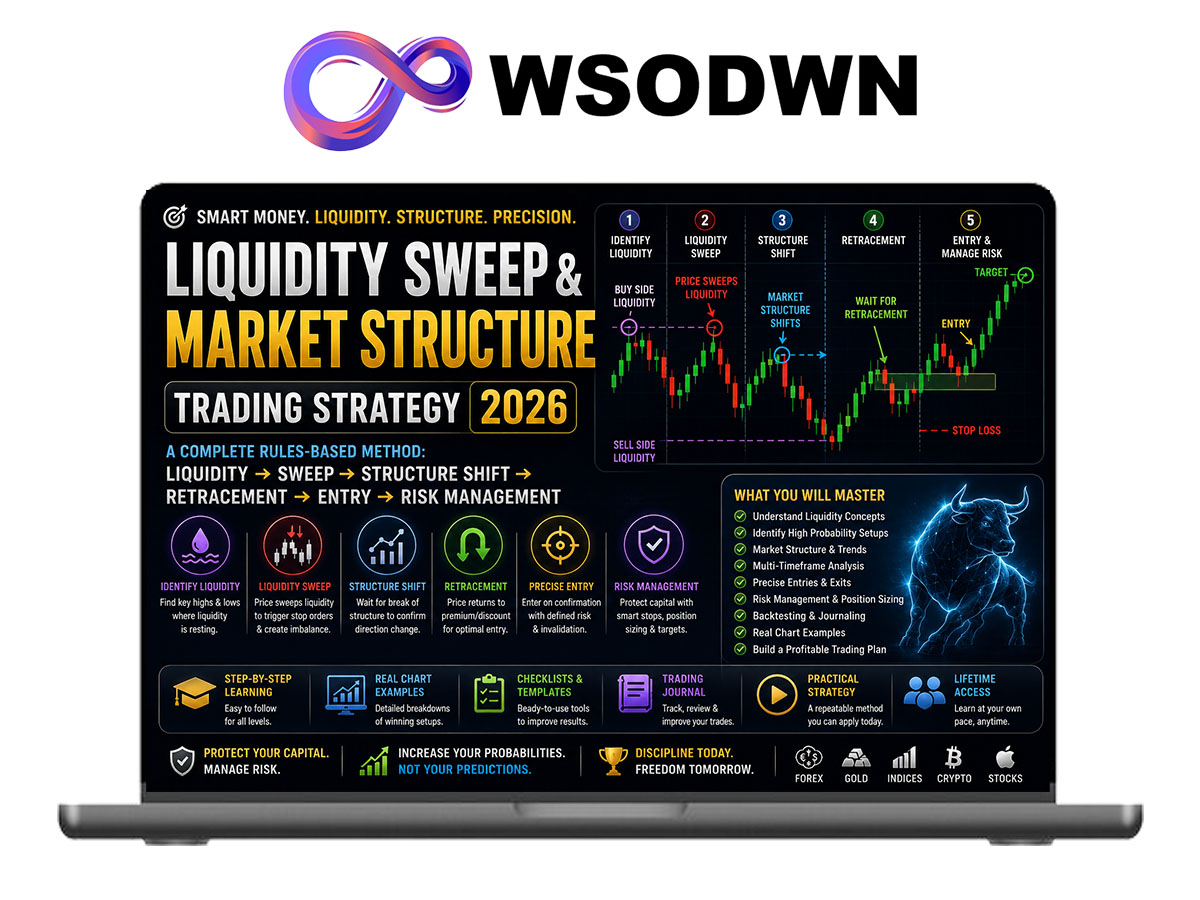
Learn a Rules-Based Trading Method Using Liquidity Sweeps, Structure Shifts, Retracements & Risk Management
Liquidity Sweep & Market Structure Trading Strategy 2026 is a focused trading course built around one specific price-action methodology: identifying areas where liquidity may be concentrated, waiting for price to sweep those levels, confirming a shift in short-term market structure, and using the subsequent retracement to plan a potential trade.
Instead of teaching dozens of unrelated indicators and strategies, this course concentrates on developing one repeatable analytical process.
The methodology can be summarized as:
Liquidity → Sweep → Structure Shift → Retracement → Entry → Risk Management
Students learn what each stage means, how to recognize it on a chart, when a setup should be ignored, and how to create objective rules for testing the strategy.
The methodology can be studied across Forex, Gold (XAU/USD), indices, and other liquid markets, although market behavior and execution conditions can differ significantly between instruments.
The Trading Method
The strategy begins by identifying an important area of liquidity.
Examples can include:
- Previous day high
- Previous day low
- Session highs and lows
- Equal highs
- Equal lows
- Significant swing highs
- Significant swing lows
Rather than automatically entering when price reaches one of these areas, the trader waits to see how price behaves.
Step 1 — Identify Liquidity
Mark important highs and lows before looking for an entry.
These levels provide the context for the setup.
Step 2 — Wait for the Liquidity Sweep
Price must trade through the identified high or low.
For example, price may move above a previous high before quickly returning below it.
The sweep alone is not an entry signal.
Step 3 — Confirm Market Structure
After the sweep, wait for evidence that short-term price structure has changed.
This could involve price breaking an important opposing swing.
The purpose of confirmation is to avoid entering simply because liquidity was taken.
Step 4 — Wait for a Retracement
Instead of chasing the initial move, wait for price to retrace toward a predefined area of interest.
The course explains how to evaluate retracements using price structure and clearly defined zones.
Step 5 — Plan the Trade
Before entering, define:
- Entry criteria
- Invalidation level
- Stop-loss location
- Profit objective
- Position size
- Maximum acceptable risk
If the setup doesn’t satisfy the trading plan, there is no trade.
Step 6 — Manage the Position
Once a position is open, follow predetermined management rules rather than reacting emotionally to every candle.
Example Bullish Setup
A potential bullish setup follows this sequence:
1. Identify sell-side liquidity
Locate an important previous low or group of similar lows.
2. Price trades below the level
The market sweeps the identified liquidity.
3. Price returns above the area
Look for evidence that the downside move is being rejected.
4. Bullish structure develops
Price breaks a relevant short-term swing high.
5. Wait for retracement
Rather than chasing the breakout, wait for price to retrace toward the planned entry area.
6. Define risk
The trade should have a clear invalidation point before execution.
Example Bearish Setup
The bearish model uses the opposite sequence:
1. Identify buy-side liquidity
Find an important previous high or cluster of highs.
2. Price trades above the level
Buy-side liquidity is swept.
3. Price moves back below
Look for evidence that price is rejecting the higher level.
4. Bearish structure develops
Price breaks a relevant short-term swing low.
5. Wait for retracement
Allow price to return toward the predetermined area rather than chasing the move.
6. Execute according to the trading plan
Entry, invalidation, position size, and target should already be defined.
What You’ll Learn
By completing the course, you’ll learn how to:
- Identify buy-side and sell-side liquidity.
- Mark previous highs and lows correctly.
- Distinguish a liquidity sweep from a confirmed setup.
- Read bullish and bearish market structure.
- Identify potential structure shifts.
- Wait for retracements instead of chasing price.
- Define objective entry and invalidation criteria.
- Apply the methodology across multiple timeframes.
- Filter low-quality setups.
- Calculate position size based on predetermined risk.
- Journal and backtest the strategy.
- Develop a repeatable trading routine.
Module 1: Understanding Liquidity
Learn the foundation behind the methodology.
- What Liquidity Means
- Buy-Side Liquidity
- Sell-Side Liquidity
- Swing Highs & Lows
- Equal Highs & Lows
- Previous Day High & Low
- Session Liquidity
Module 2: Liquidity Sweeps
Learn what happens when price moves through important levels.
- Understanding Sweeps
- Sweep vs Breakout
- Wick Sweeps
- Strong Displacement
- Failed Sweeps
- Common Misinterpretations
Module 3: Market Structure Confirmation
A liquidity sweep by itself isn’t enough.
Learn how to wait for additional confirmation.
- Bullish Structure
- Bearish Structure
- Swing Points
- Structure Breaks
- Structure Shifts
- Confirmation vs Prediction
Module 4: The Retracement Entry Model
Learn how the strategy approaches entries after confirmation.
- Why Avoid Chasing Price
- Identifying Retracements
- Entry Zones
- Price Rejection
- Confirmation Entries
- Invalid Setups
Module 5: Multi-Timeframe Framework
Use higher timeframes for context and lower timeframes for execution.
Example workflow:
Higher Timeframe → Direction & Key Levels
Intermediate Timeframe → Liquidity
Lower Timeframe → Confirmation & Entry
You’ll learn how to keep timeframe analysis simple without creating conflicting signals.
Module 6: Complete Bullish Trading Model
Study the entire bullish methodology from beginning to end.
Sell-Side Liquidity → Sweep → Bullish Structure Shift → Retracement → Entry → Target
The module includes chart exercises and examples of both valid and invalid setups.
Module 7: Complete Bearish Trading Model
Learn the inverse setup:
Buy-Side Liquidity → Sweep → Bearish Structure Shift → Retracement → Entry → Target
You’ll study how bearish setups develop and when the conditions aren’t strong enough to justify a trade.
Module 8: Stop Loss & Trade Invalidation
Every setup needs a point where the original idea is considered invalid.
Learn:
- Structural Invalidation
- Stop Placement
- Avoiding Arbitrary Stops
- Spread & Volatility Considerations
- When a Setup Is No Longer Valid
Module 9: Profit Targets
Learn how potential exits can be planned using market structure rather than arbitrary expectations.
Topics include:
- Opposing Liquidity
- Previous Highs & Lows
- Structural Targets
- Partial Exits
- Risk-to-Reward Considerations
Module 10: Risk Management
The methodology is incomplete without risk control.
Learn:
- Position Sizing
- Percentage Risk
- Maximum Daily Risk
- Consecutive Loss Management
- Drawdown Control
- Avoiding Excessive Leverage
Module 11: Setup Filters
Not every liquidity sweep should be traded.
Learn how to evaluate:
- Market Conditions
- Trading Sessions
- Volatility
- Higher-Timeframe Context
- Economic News
- Poor Risk-to-Reward
- Unclear Market Structure
Sometimes the correct decision is simply no trade.
Module 12: Backtesting the Strategy
Before considering live execution, learn how to evaluate the methodology using historical market data.
Record:
- Market
- Date
- Session
- Liquidity Level
- Sweep
- Confirmation
- Entry
- Stop
- Target
- Outcome
- Screenshot
- Notes
A meaningful sample of trades can then be reviewed to understand how the rules performed historically.
Module 13: Building Your Trading Plan
Turn the concepts into clearly defined rules.
Your final trading plan should answer:
Where can I trade?
What liquidity am I looking for?
What qualifies as a sweep?
What confirms the setup?
Where can I enter?
What invalidates the idea?
Where is the target?
How much am I willing to risk?
If those questions cannot be answered before execution, the setup isn’t ready.
Bonus Resources
- Liquidity Mapping Checklist
- Bullish Setup Checklist
- Bearish Setup Checklist
- Backtesting Spreadsheet
- Trading Journal Template
- Risk Management Worksheet
- Pre-Trade Checklist
- Post-Trade Review Template
Who This Course Is For
This course is suitable for traders who want to move away from random entries and develop a more structured price-action methodology.
It can be particularly useful for:
- Forex traders
- XAU/USD traders
- Index traders
- Day traders
- Price Action traders
- SMC traders
- Intermediate traders refining their execution
- Beginners who want to study a clearly defined methodology
Why Learn This Trading Method?
The objective isn’t to predict every market movement.
Instead, the methodology teaches traders to wait for a specific sequence of events before considering a position:
Identify → Wait → Confirm → Execute → Manage → Review
That makes the strategy easier to document, backtest, and improve than an approach based primarily on intuition.
Most importantly, no individual setup is assumed to succeed. Risk management remains part of every trade because even a well-defined methodology can experience losing trades and extended periods of poor performance.
Educational Disclaimer: This course is provided for educational purposes only and does not constitute financial or investment advice. The strategy described does not guarantee profitable trades. Historical or backtested performance does not guarantee future results, and trading leveraged financial instruments can result in substantial losses.


Reviews
There are no reviews yet.